


Back in June, we received a request to help build a website for an academic non-profit organization (our friends at AAUM), in Braga, Portugal. They needed a website to help spread awareness of the MinhoCovid19 movement, a group of people trying to supply organizations in need (nursery homes, hospitals, etc) with protective materials built by volunteers.
Their operation was relatively simple, in theory at least. They connected donators of either money or materials, to the organizations in need, handling all of the logistics. The volunteers were using Airtable to manage inventories, deliveries, and also transparency reports regarding financial movements, which are required to be public by Portuguese laws.
Getting technical
What they needed was a simple marketing landing page, with some stats that represented the actual progress of the movement. The team at the time was hoping that we could set up a CMS to power the website's data and copy, and they would copy over manually some of the data from Airtable to said CMS. Unbeknownst to them, Airtable could solve most of these problems directly, because Airtable itself would generate HTTP APIs for each of the tables they had, and we could directly fetch the data from there.
So, we decided to build the website with Next.js, as most of the developers that volunteered to help had React experience. Next.js static site generation abilities were also a factor in choosing it, as we didn't want to manage (and pay for) dedicated hosting. We still plugged in Forestry, a git-based CMS, so the team could edit the website's copy easily. Then we would just deploy everything from Github to Netlify. As the site is static, costs would be non-existent or pretty low, and we would not be rate-limited by Airtable at all.
Show me the code!
Disclaimer: not all of the Airtable data could be used on the Website. Currently, the transparency report is being imported from the Airtable, the rest is managed on the CMS side. We are working with the volunteering team to migrate every single data piece to Airtable (except the copy of the website, which will be kept on Forestry).
With Next.js it's pretty easy to integrate with Airtable. First, install Airtable:
yarn add airtable

// or

npm install airtable
Then we just need to get an API key on Airtable, you can follow this guide on how to get there but just look for it on your account settings. I recommend that you create an Airtable bot user, a separate account with access just to the base you need. Each base is basically a project on Airtable so, that way, I avoid using my own API key. If an evil thief gets access to it, all of my bases would get compromised. To even make it more secure, we created a user that only has read-only access to the respective base.
After getting the API key, just create a .env file with this content:
AIRTABLE_API_KEY=api_key
Next.js will automatically pick up that value from your .env file.
Now, let's see the content of our table.
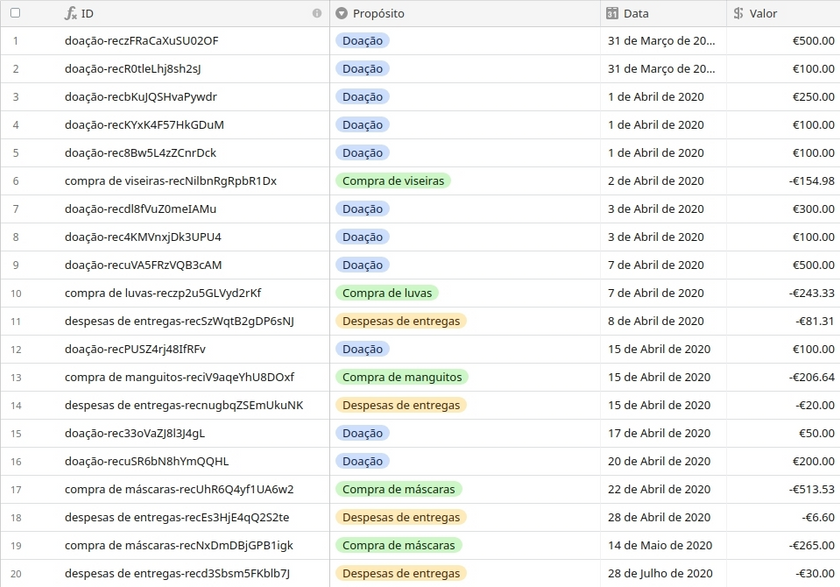
The table labels are in Portuguese, translated to English they are: ID, Purpose, Date, Value. Basically, they represent a list of financial transactions, with their purpose (whether they were donations, material acquisition, etc), their date, and their value.
Airtable automatically generates an HTTP API for each table. You can play with it on their API playground and figure out how to use it. They can even generate Javascript code for listing, retrieval, and create operations. It acts as a good base for what we want to do next.
Now, we want to get all of these values on our Next.js app. In our case, we slightly changed the generated code to do what we needed. This is how we did it:
src/lib/getTransparencyReport.js
const Airtable = require("airtable");

const base = new Airtable({ apiKey: process.env.AIRTABLE_API_KEY }).base(
  "<HIDDEN BECAUSE SECURITY STUFF>"
);

export default function getTransparencyReport() {
  const totalRecords = [];

  return new Promise((resolve, reject) => {
    base("Relatório de Transparência")
      .select({
        fields: ["Propósito", "Data", "Valor"],
        sort: [{ field: "Data", direction: "desc" }],
      })
      .eachPage(
        function page(records, fetchNextPage) {
          records.forEach((record) => {
            const id = record.getId();
            const purpose = record.get("Propósito");
            const date = record.get("Data");
            const value = record.get("Valor");

            if (!purpose || !date || !value) return;

            totalRecords.push({
              id,
              purpose,
              date,
              value,
            });
          });

          fetchNextPage();
        },
        function done(err) {
          if (err) return reject(err);

          return resolve(totalRecords);
        }
      );
  });
}
We extract the fields from the table, sorted by date, and return an array of objects with these keys [date, purpose, value]. Then, we use Next.js data fetching mechanism getStaticProps to get this data at build time.
src/pages/transparency.js
import React from "react"; import PropTypes from "prop-types"; import getTransparencyReport from "root/lib/getTransparencyReport"; //excluded most of the code for simplicity sake export default function TransparencyPage({ transparencyReport }) { return <> {transparencyReport.map(reportLine => ( <div key={reportLine.id}> <p>{reportLine.date}</p> <p>{reportLine.purpose}</p> <p>{reportLine.value}</p> </div> )} </>; } TransparencyPage.propTypes = { transparencyReport: PropTypes.arrayOf( PropTypes.shape({ id: PropTypes.string.isRequired, date: PropTypes.string.isRequired, purpose: PropTypes.string.isRequired, value: PropTypes.number.isRequired, }) ).isRequired, }; export async function getStaticProps() { return { props: { transparencyReport: await getTransparencyReport(), }, }; }
I've omitted most of the code here for easy demonstration purposes. Check the actual real code at our git repo.
So, every time we run next build && next export we are going to build the entire site and fetch everything from Airtable.
Updating Airtable data
Now, we are using Next.js as a static site generator. The website data is not live but updates are made daily if not weekly at best. So how do we update the data on Airtable and trigger a site rebuild? If we make changes on the CMS, we trigger git commits to the repo and Netlify picks that up and rebuilds the site.
However, Airtable does not have any sort of notification mechanism (like webhooks for example) to trigger Netlify builds (at the time of writing this blog post). The only option that's left is to schedule periodic builds.
UPDATE: It seems Airtable now supports running custom scripts on the Automation tab. So you can run a post to a Webhook whenever you create/update records on your tables! Only on the Airtable Pro and Enterprise plans though. I still usually recommend the periodic Netlify deploy, even as a fallback, to make sure the website keeps being updated, even if the integrations fail.
We decided to settle on 1 periodic build per day, using Github Actions to deploy everything.
To start building the website on Github Actions, just add the necessary environment variables to your Github project's secrets section. Also, set these secrets on your repository settings.
- NETLIFY_SITE_ID - Go to Site settings > General > Site details > Site information, and copy the value for API ID.
- NETLIFY_AUTH_TOKEN - Go to User settings > Application > New Access Token
- AIRTABLE_API_KEY - you can use your local AIRTABLE API key
Now, we need to define the workflow:
.github/workflows/deploy.yml
{% raw %}
name: Daily Netlify Deploy

on:
  schedule:
    - cron: '0 0 * * *'

jobs:
  deploy:
    runs-on: ubuntu-latest

    steps:
      - uses: actions/checkout@v1

      - uses: actions/setup-node@v1
        with:
          node-version: ${{ matrix.node-version }}

      - name: Build website
        run: yarn && yarn build
        env:
            AIRTABLE_API_KEY: ${{ secrets.AIRTABLE_API_KEY }}

      - name: Upload to netlify
        uses: netlify/actions/cli@master
        with:
            args: deploy --prod
        env:
            NETLIFY_SITE_ID: ${{ secrets.NETLIFY_SITE_ID }}
            NETLIFY_AUTH_TOKEN: ${{ secrets.NETLIFY_AUTH_TOKEN }}
{% endraw %}
We are using the schedule option to trigger this workflow every day at midnight. Then our steps are very simple, we just run our build script, and use the netlify-cli action to deploy the website with the prod flag, which will actually overwrite the existing regular Netlify build with the new one.
If your project is open-source, Github Actions minutes are completely free. Also, you do not consume Netlify build minutes if you already upload a finished build. I use this pattern on pretty much all of the static websites I build with periodic rebuilds, to keep their data up to date.
Final notes
This is another example of how no-code tools are not here to put us, developers, out of a job. They have a lot to offer to us via cool integrations like these ones. It also shows that services with good developer docs and APIs, like Airtable, end up being a massive success.
Feel free to check the Github repo for inspiration for your projects.
Stay safe out there ❤️